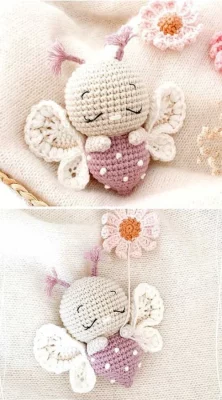
Amigurumi Cute Butterfly – Free Pattern

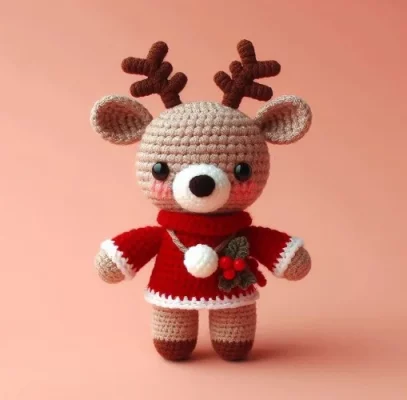
Creating a CROCHET CHRISTMAS REINDEER AMIGURUMI – FREE TUTORIAL is a fun and festive way to prepare for the holiday season.
Whether you’re making it as a gift, a decoration, or as part of a handmade collection, this tutorial will guide you through each step. With the right materials and techniques, you can craft a charming reindeer that captures the magic of Christmas.
The CROCHET CHRISTMAS REINDEER AMIGURUMI – FREE TUTORIAL is perfect for both beginners and experienced crafters. The process involves simple crochet stitches, stuffing, and assembling different parts to bring your reindeer to life.

This project allows for personalization, so you can choose colors, accessories, and facial expressions that match your style.
This tutorial will take you through gathering materials, crocheting different parts, assembling them, and adding final touches. Follow along to create a delightful Christmas reindeer that will brighten up your holiday decorations.
Before you begin, it’s essential to gather all necessary materials. Having everything ready will ensure a smoother crocheting experience and a high-quality finished product.
Having all the materials at hand before you start will prevent interruptions. Choosing the right yarn texture can enhance the reindeer’s look and feel. Soft stuffing ensures the reindeer remains plush and cuddly. Safety eyes or embroidered features add character and charm. Keeping a workspace organized helps in maintaining focus. A well-lit area makes the process more comfortable and enjoyable.
The CROCHET CHRISTMAS REINDEER AMIGURUMI – FREE TUTORIAL begins with crocheting the head and body, forming the foundation of the reindeer’s shape.
A well-shaped head and body create the foundation of a cute amigurumi reindeer. Balanced stuffing ensures a plush yet firm structure. Careful placement of facial features enhances expressiveness. Keeping stitches consistent results in a professional finish. Crocheting in a relaxed manner avoids uneven tension. A properly closed base helps the amigurumi maintain durability.
The limbs and antlers add character to your reindeer and complete its adorable shape.
Symmetry and secure attachments are key to achieving a polished look. Properly stuffed legs ensure stability. Curved ears add a lifelike touch. Antlers give the reindeer its distinctive holiday appearance. Careful stitching prevents parts from detaching over time. Adjusting placement before sewing ensures an aesthetically pleasing final result.
Now that the main structure is complete, it’s time to personalize your CROCHET CHRISTMAS REINDEER AMIGURUMI – FREE TUTORIAL with festive embellishments.
Customizing your amigurumi makes it unique and personal. A red nose adds a classic Christmas feel. A tiny scarf keeps the reindeer cozy. Small accessories enhance festive charm. Embroidery details give personality to the creation. Checking durability ensures longevity. Making final adjustments results in a polished, adorable piece.
Q: Is this pattern suitable for beginners? A: Yes! The tutorial includes step-by-step instructions, making it ideal for all skill levels.
Q: Can I use different yarn colors? A: Absolutely! Customize your reindeer with colors that match your holiday decor.
Q: How do I make my reindeer baby-safe? A: Use embroidered features instead of safety eyes and secure all parts tightly.
Q: Can I sell the finished product? A: Yes, as long as you credit the original pattern and do not mass-produce.
Q: How do I clean my crochet reindeer? A: Spot clean with mild soap and water; avoid machine washing.
Q: What if my stitches look uneven? A: Practice maintaining even tension and use a consistent hand movement while crocheting.
By following this CROCHET CHRISTMAS REINDEER AMIGURUMI – FREE TUTORIAL, you can create a beautiful handmade decoration that embodies the holiday spirit. From gathering materials to final touches, each step contributes to a delightful, festive piece.
Now, it’s your turn! What did you think of this tutorial? Share your thoughts and suggestions in the comments below!
