
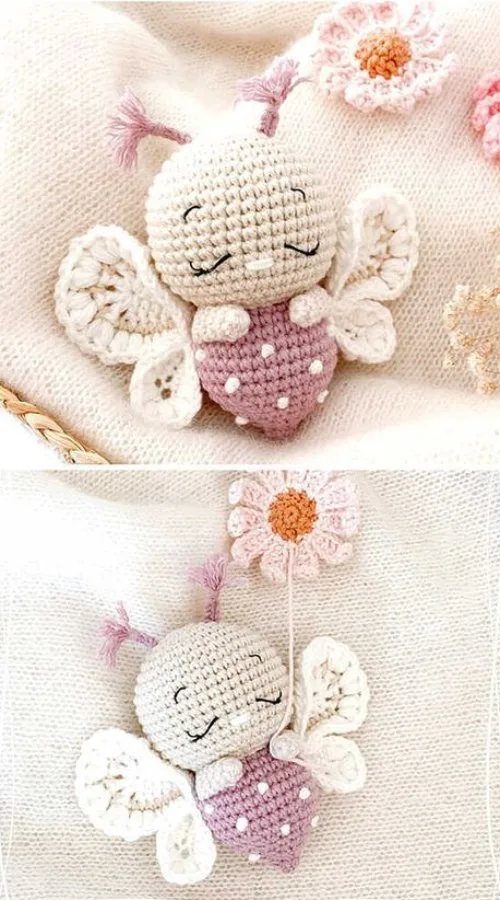
Amigurumi Cute Butterfly – Free Pattern

Creating an Amigurumi Cute Butterfly – Free Pattern is a fun and rewarding crochet project, perfect for beginners and experienced crafters alike. This adorable crochet butterfly can be used as a decorative piece, a keychain, or a charming gift for loved ones. In this tutorial, we will go through the step-by-step process of crocheting your very own Amigurumi Cute Butterfly – Free Pattern with easy-to-follow instructions.
Using the right materials and stitches, you can create a colorful and vibrant butterfly that adds a touch of whimsy to any setting. This project is perfect for using leftover yarn, allowing you to mix and match colors for a unique look. Whether you’re making this for yourself or as a thoughtful handmade gift, this Amigurumi Cute Butterfly – Free Pattern will surely bring joy to anyone who receives it.
Let’s dive into the steps to create your own Amigurumi Cute Butterfly – Free Pattern and explore the best techniques to ensure a smooth and enjoyable crochet experience.
Choosing the right materials is essential for creating a perfect Amigurumi Cute Butterfly – Free Pattern. The right yarn, hook, and stuffing will help you achieve the desired look and feel.
Having these materials ready before starting ensures a smooth workflow and an enjoyable crafting experience. The choice of colors and yarn texture will significantly impact the final appearance of your Amigurumi Cute Butterfly – Free Pattern.
The body is the core of the Amigurumi Cute Butterfly – Free Pattern, and it sets the foundation for the rest of the design.
Taking time to crochet a well-shaped body ensures the final result looks professional and polished. Proper stuffing and securing the yarn ends will keep the butterfly durable.
The wings are the most eye-catching part of the Amigurumi Cute Butterfly – Free Pattern. They add character and beauty to the final piece.
Well-crafted wings bring life to the butterfly. Using bright colors and proper shaping techniques will enhance its overall appearance.
A cute Amigurumi Cute Butterfly – Free Pattern is incomplete without delicate antennae and facial details.
Adding these finishing details will make your butterfly unique and full of personality. Paying attention to small elements ensures a high-quality handmade creation.
1. What type of yarn is best for an amigurumi butterfly?
Cotton or acrylic yarn works best, as they hold their shape and stitches well.
2. Can I use a larger hook for this pattern?
Yes, but a larger hook will result in a looser stitch and a bigger butterfly.
3. How do I keep my stitches even?
Using a stitch marker and practicing tension control helps keep stitches consistent.
4. Can I make the butterfly bigger?
Yes, by using thicker yarn and a larger hook, you can scale up the butterfly.
5. How do I attach the wings securely?
Use an embroidery needle and sew them firmly to the body with tight stitches.
6. What’s the best way to stuff the butterfly?
Add fiberfill in small amounts and shape it evenly for a smooth appearance.
Creating an Amigurumi Cute Butterfly – Free Pattern is a delightful and creative project that brings joy to both the maker and the receiver. By following this tutorial, you will have a beautifully crafted butterfly with colorful wings and charming details. Whether for personal use or as a handmade gift, this crochet piece is sure to bring smiles.
We hope you enjoyed this pattern! Let us know in the comments what you think, and feel free to share your creations and suggestions. Happy crocheting!